Sunday, May 25, 2014

The Colette Guide to Sewing Knits, a review


This was one of my  Mother's Day gifts from my children. One sewing book and one gardening book. I had added it to my Amazon wish list because the free chapter looked good.  The book is unfortunately,  disappointing on so many levels. 

The photos are of poor quality and way to small to illustrate the techniques being demonstrated.  There are too many photos of tools that could be better shown in one larger, clearer photo. I have no clue why she chooses to use such a shallow depth of field. It's rather irritating to have a picture of a slip with one breast in focus and the other out of focus due to that shallow depth of field she seems so fond of.  It's useful when you want to isolate a portrait in the landscape to focus on the figure, but one breast in and one out of focus?  None of the photos are particularly crisp which makes them less than useful.  
The other issue I have with the photos is that light colored garments are shown against nearly identical background colors making what is being shown nearly  indiscernible. There are some photos of patterns that are so faint as to be useless.

Then there are the garments being used to demonstrate  technique. It's nearly impossible to understand from the photos what is being shown.  That, and the garments aren't anywhere near being quality samples. 

The chapter on adjusting your pattern for fit leaves a lot to be desired. As a full busted woman I know that adding just to the side seam at the bust is not enough. I need to add length to go over my bust so that the front doesn't hike up.  Not so here. The rest of this chapter is just as lacking.  

The writing is fortunately far better than the photos used and there is some useful information here.  But, for me the negatives far outweigh  the pluses and I can't recommend purchasing  this book.It is a self published book and it would have really gained a lot if it had some professional help.   If you can find the Tauntion series that's out of print with it's books on The Easy Guide to  Sewing Tops and T shirts, this one is by Marcy Tilton, and  Sewing Knits by Connie Long,  you'll get a lot more and clearer information than is available in this book. 
Have a lovely Memorial Day

Sunday, April 27, 2014

Choices Made

After considering my choices I decided on the Helmut Lang separates with a  small change. I didn't like the skirt draft and decided to use another of his skirts, the one below but longer.  I made up a muslin and  played with it a bit by cutting  into the angle of the skirt until it looked good to me.  It looks good on me, but you'll have to wait until the final since I took apart the skirt to transfer the angles to my skirt draft.


Starting with my tnt knit top pattern and an article in  January 2014 issue in Threads by Londa Rohlfing to draft the cowl back.  The first one wasn't low enough, so I went back to the original pattern and redrafted it for a lower cowl.  Both muslins are worth finishing since they make very nice tops that will be cool for  summer with the open back.
The pattern on the left is the first one I drafted.  The one on the right is what I'll use for my wedding outfit.  


I'm not sure that you can see it, but the one on the right has a lower, wider neckline to form the deeper cowl.

I chose Emmaonesock's 11 ounce rayon lycra jersey for the fabric.  After pre washing I'll be ready to cut out and sew.  


Tuesday, April 15, 2014


I opened my email this morning from Keep it Chic and saw this very chic woman wearing a rain bonnet. I haven't seen one of these since I was a teen maybe?  I know my mother wore these and I wouldn't be caught dead in one of these.  Except when I am caught in the rain without an umbrella or I don't really want to carry one anyway.  When you don't have a free hand a rain hat certainly would be welcome.  I've thought of making one for myself but I never have.  I don't mind being out in a mist, after all here in the suburbs I only have to go from the house to the car or car to store and my hair is curly so mist usually doesn't do all that much damage. But in a downpour who wants to look like a bedraggled rat?  Do any of you wear rain bonnets these days?  What do you wear in the rain?

Friday, April 4, 2014

Decisions!

I'm comfortable with my everyday style; I know what I like and what looks good on me and I don't have trouble figuring out what to sew or wear.  Dressy clothing is another matter,    My nephew is getting married in June in  Ojai, California.  It's an outdoor wedding and it will undoubtedly be hot until the sun goes down. It's also on the longest day of the year and so sundown will not be early!  It's not a formal wedding so I have some lee way, but it is a Saturday night.  

Part of my issue is that I want to wear sleeves, not being really happy with my upper arms. part of it is that  I am heavier than I want to be but I really don't want to wear spanx.  The heat and I don't really do all that well together and Spanx is one more layer. The third issue is that I don't want to look dowdy or boring. Really, does anyone? I also don't like lots of 'stuff' or most prints' on dresses. I like clean, minimalist clothing which is very easy to be boring in! I've been scouring sites like Net  a Porter, Bergdorf Goodman's and Saks Fifth Avenue and found a few things that I like but can't really find a pattern that will fit the bill though I've ordered several!  I found this Stella McCartney dress that I like, though the daisy print is a tad young for 'me. It's also too short, but that is an easy fix, if I can find a pattern that's close enough to alter.  I like the neckline and the front zipper.


This Helmut Lang out fit appealed to me though as it is it's not dressy enough. Maybe in all black?  I think that it appeals to me because it's separates and I can wear them separately and I'd actually be likely to wear it again.  Dressier shoes and a statement necklace would dress it up too.


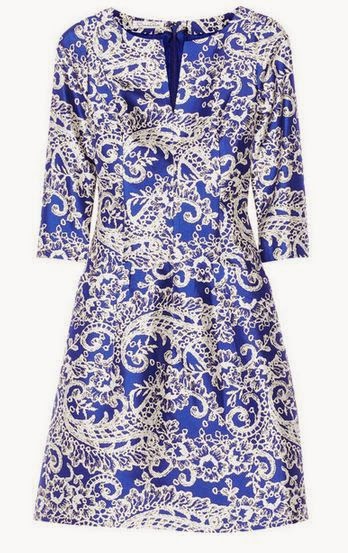
I found this Oscar de la Renta dress which is similar to the first dress.


I have 10 yards of black silk linen that I bought at a Michael's sale that I'd like to use for this if I don't make the knit.  But, boring, no?
Now for the patterns.
Vogue 1397

Vogue 1380

V1348
Vogue 1349  I'd add sleeves to either of the sleeveless dresses.

Then there's this pattern that I bought awhile ago. I saw a  review on Pattern Review with it done up in a brocade, so it could work.  


Vogue 1254 

Maybe I can't make up my mind because nothing really excites me. I like the Helmut Lang outfit the best but I am not sure that it's really going to be dressy enough.  Decisions decisions.  Opinions and advice are welcome.


Tuesday, April 1, 2014

Making a Weighted Blanket

My son Josh asked me to make 3 weighted blankets for our grandson Jakob. These blankets are available ready made, but aside from being fairly ugly they are also expensive.  He was given an instruction sheet that was not all that helpful so he asked me to write this post so that anyone who wants to make a blanket can.  It wasn't hard after I figured out what I was doing wrong with the first one!  I somehow decided to sew 12 rows. Terrible idea.  I couldn't believe how easy it became when I used the proper number of rows!

There are 5 columns and 8 rows.


Materials: At least 1.25 yds of cotton poplin or flannel.  You need extra to account for shrinkage and straightening the ends.  Wash and dry at least twice on hot before cutting it.
5lbs of craft pellets for each blanket. craftpellets.com

1.  For each blanket cut 2 pieces 21" x 31.5" from printed cotton.  Jakob picked out this glow in the dark astronaut print from fabric.com.  Unfortunately the cotton flannel he chose shrank quite a bit in width as well as length. I ended up using the fold of cloth as one side of the blanket instead of being able to seam it, which was fine.
  
 2.   Using 1/2" seams sew the sides and bottom. Either use a serger or sew a second row of stitches a quarter inch from the first stitching line towards the outside edge. Fold down 1/2" and press  across the open top edge of the blanket. Press the seams.  Turn right side out.

3.  Sew 5 columns 4" wide the length of the blanket.

4.  Measure and mark the lines for the horizontal boxes that will hold the craft pellets. I found that the chalk marks rubbed off before I got very far up the blanket.  I marked all of the lines with blue masking tape on the upper side of the line before I started sewing.


5.  You'll need a scale to divide up the pellets.  5lbs or 80 ounces divided by 40 boxes comes to 2 ounces per box.  I used paper cups to fill each row.  Pin at least 1/2" below the line so that your presser foot won't get caught in the pellets.  I found that I had to take small bites in the fabric with my pins overlapping the ends so that the pellets wouldn't migrate into the sewing line. You definitely can't sew over these little pellets!  When I got towards the top I pinned each box after I filled it. They are too easy to spill out otherwise!  Here's the finished blanket.


Jakob with the finished blanket. He likes it, but he loves that the astronauts glow in the dark. 
If you have any questions please feel free to email me.

Wednesday, March 26, 2014

Alex's Birthday Present


II bet you're wondering where my coat is?  It's in the closet unfinished where it is likely to remain until fall. It took me a lot longer than I anticipated, not just because of three muslins, but lack of focus falls in there too. I did manage to get a really good fit though.   I finally stopped because I had two projects I had to get done.  The first one is this top for Alex's birthday.  


She sent me an old t shirt that fit but was worn so that I could cut it up and make a pattern from it.  She picked this fabric out when she was home for Thanksgiving. It's a poly lycra knit from Gorgeous Fabrics that's been sitting in my stash for awhile. I did not see how the original t fit her, but this isn't too bad. The front has some gathers at cf but that's the only detail.  Obviously it's a simple sew and the only change I made was to the height of the armscye.  When I saw the pattern I realized that the front and back were the same height when the back armscye should be about a 1/2" longer than the front. I took off  1/4" from the front and added a 1/4" to the back.  She's happy with the t shirt and I'll make her at least one more.  

She always gives me a hard time about not getting things shipped in time so I got it shipped out priority mail last Monday.  It was supposed to arrive in Austin on Wednesday.  It did, just not in her box.  Her birthday was Friday the
 21st but she had to wait until Monday for the regular mail carrier to find it for her. Happy Birthday Alex!  

The second project took a lot more time than this one. I made 3 weighted blankets for my grandson Jakob.  I'll write about how to make them in my next post.


Monday, February 24, 2014

Look What Seth Made Me!


Seth is an inveterate yard sale shopper and if he sees sewing notions he usually buys them for me. The sleeve board on top was one of those purchases. It was  shallow, maybe an inch between the top and bottom, so not very useful except that it was very narrow.  He took it apart and used a leftover piece of balustrade from my parents house.  We are talking about the mid fifties when they built their house.  My dad saved the leftovers and they were handed down to Seth when they sold the house some years ago. He used the top, rounded part for a very nice seam roll long enough to press a leg seam open without having to move it.  The bottom of it was left and he used it vertically to make this sleeve board usable.  The lower board is larger and just what I needed for my pressing table. I'ts more for pants and anything that isn't completely flat. I had him make it the height of the old sleeve board that you can see behind the new ones.  He made this one from scratch with some oak he had left over. I drew out a template for the size I wanted and he cut it out along with a base large enough for stability. He used two pieces of the balustrade back to back. He's nothing if not frugal!  My Dad would be appreciative of Seth's inventiveness. I padded it and lazily, just stapled the covering down.  It's really wonderful to have good pressing tools.  To quote Kenneth King, good pressing can save bad sewing and bad pressing can ruin good sewing.

Fortunately I test interfacings before deciding what to use in a project. My coat is all cut out and I started making bound button hole samples since it's been awhile since I made any. In the process I noticed that my fabric had become flat and shiny after applying the interfacing for my samples.  I tried pressing against a piece of self fabric.  No improvement.  I changed the interfacing to a low temp fusable. No improvement.  Then I hit on the idea of using my needle board. That worked, but it's not practical for a whole coat. It's small and if I hit the edge it showed.  I need some fusible for the buttonholes and the welts so that the fabric doesn't shred away so I will use my needle board for that. So, what to do? This is not a coat that will be pad stitched since there  are no collars or lapels.   I looked at all my tailoring books and came up with no solution.  This morning I kept searching and pulled out Sandra Betzina's Power Sewing.  She loves to underline a jacket with cotton flannel and since it is not a substitute for interfacing she suggests fusing the interfacings to the non fuzzy side.  Perfect for the front of my coat and just the flannel for the back and sleeves. I was planning on using cotton flannel to interline the lining for warmth, but I'll apply it to the coat fabric instead.   I will still use hair canvas for the facings.  I will either apply them as Kenneth King suggests by zig zagging it to a light weight cotton at the 1" mark and trimming out the interfacing.  The thin cotton will then be sewn into the seam.  Faster than hand sewing the interfacing to the seam allowance.  I will apply bias hair canvas to the hem by hand.   While waiting for my hair canvas to come I'll cut out the flannel.  Thanks to Pam from Fashion Sewing Supply it will be sent out this morning.  I had  added a pleading comment when I ordered it yesterday. She happened to be in the office when my order came in and she responded immediately. Thanks for the speedy service Pam!

My buttonhole samples worked out well. I tried several different methods and decided on using the welt method. This involved the least amount of pressing, an advantage here and I was able to get uniform buttonholes.  I came up with a nice variation that made it easier.  But, another post for that.